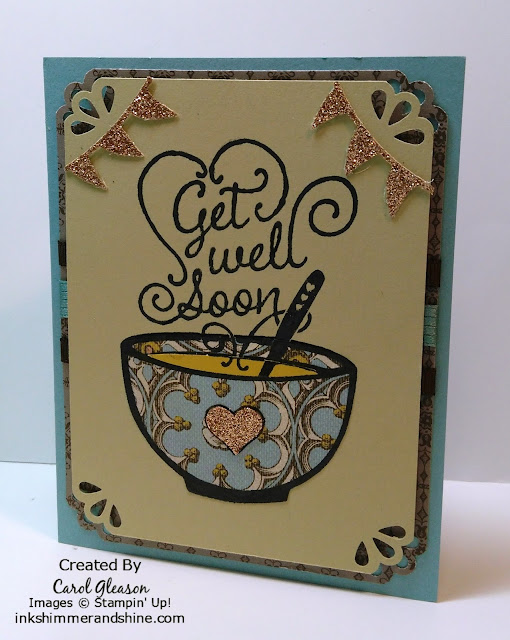
Get Well Soon with Get Well Soup!
Many of the Stampin' Up! items on this card are retired, but feel free to substitute what you have to make this card your own. Sometimes older products and stamps need love too!
My favorite part of this card is the pretty corners made with the Curvy Corner Trio punch, which is still available! Click the items in the directions below for more information on the products used.
To create this card:
- Start with an 8-1/2" x 5-1/2" piece of Baja Breeze (retired) or other light blue cardstock.
- Cut a 5-1/4" x 4" piece of Early Espresso from the Neutrals Patterns Designer Series Paper Stack (retired), or use Early Espresso cardstock.
- Add ribbon to the Early Espresso piece, if desired. This sample shows the Lost Lagoon Stitched Satin and 1/4" Early Espresso Grosgrain ribbon.
- Cut a 3-3/4" x 5" piece of River Rock cardstock.
- Use the Curvy Corner Trio punch to make pretty corners on the Early Espresso and River Rock layers.
- Attach the Early Espresso layer to the card base.
- Stamp the Get Well Soup stamp in Jet Black Stazon ink on the River Rock layer. Then stamp the bowl on Soho Subway DSP and the soup on Summer Starfruit. Carefully cut out the soup piece from Summer Starfruit with your Paper Snips and the bowl piece from the Soho Subway DSP.
- Layer the cut out bowl and soup onto the stamped image on the River Rock piece, lining up the images. Fill in the black outline with a Basic Black Stampin' Write marker, if needed.
- Attach the River Rock layer to the Early Espresso layer with Stampin' Dimensionals.
- Punch a heart from Gold Glimmer paper with the Itty Bitty Accents Punch Pack and adhere over the heart on the bowl. Outline the heart with an Early Espresso Stampin' Write marker if you want it to stand out a little more.
- Die cut two gold glimmer banners with the Balloon Framelits. Tip: the framelits dies cut through glimmer paper easier if you place the framelit on the non-glittered side of the paper. Trim the banner to fit the corners of the River Rock layer and attach them with Mini Glue Dots.


No comments:
Post a Comment